Hindtronic

Electronic & Learning Technologist Project Logs

3D CAR RACER – Part ONE (Group 2 2022) — November 8, 2022

3D CAR RACER – Part ONE (Group 2 2022)

This particular lesson is a great one to follow on from the last few weeks with Space Invaders (part one and two here) as we are making a very different game on the surface, but under the hood, we have very similar mechanics for the class to look at and transfer into another game.

I start this week by drawing on the whiteboard the level layout for Space Invaders, and then the 3D Car Racer game and we discuss what is the same to what we have done before. This worked really well as they could see that certain elements (The car and the spaceship) were practically identical in terms of movement, and that they could copy their code from the one to the other.

Other elements that they could reuse or remix:

  1. The restricted area from whack a ghost, for the traffic coming down the road
  2. Any of the score/highscore/timers they have used before

I start the class like last time with a premade game that is shared with the sprites and background preloaded to speed up the process (you can also use it too, I have updated it since last time). I did this by using some free sprites from an itch.io site which is linked here.

What is included is a background which includes a red bar at the bottom to enable WHEN TOUCHING COLOUR for IF statements for passing traffic along with two traffic vehicles (car and bus) and then a player car. The player car has all eight points of driving direction, to allow animation of turning left and right, but also to “spin out” when they hit traffic and crash.

This lesson, we focussed on getting the car moving left and right but maintaining within the sides of the road. This is what they copy from Space Invaders, and they pick up quickly. One thing to watch out for is the confusion between > and < in the operators, and they end up driving opposite to the button presses.

The next task is to take the traffic, and create a clone loop to generate new clones and delete them when we “drive” past them. In actuality it is the traffic that move on the vertical plane and we are static.

We borrow the idea from Whack a Ghost here. We know that the horizon line on this background is Y85. This means that we can use code that says WHEN I START AS A CLONE and use the GOTO X Y block and say Y85. This means they will always appear on the horizon. We then, want to make sure that the traffic only appears on the road, but somewhere on the horizon line. To do this, we add a RANDOM number operator to the X side of the GOTO, and say between -100 to 100. This means that from the left to the right of the horizon line, a car will spawn. test it out with a WHEN FLAG CLICKED and attached to this a FOREVER loop, with a CREATE A CLONE OF MYSELF and a WAIT command. Now on the WHEN I START AS A CLONE, add the GOTO X RANDOM and Y85 and watch as the cars fill the horizon.

To get the cars to move and go down the screen, we are going to lean on our ideas from Space Invaders. We are going to add a REPEAT UNTIL loop below the GOTO XY on the WHEN I START AS A CLONE, and this will contain a simple bit of code that says REPEAT UNTIL TOUCHING RED (where red is the colour at the bottom of the background) and inside a CHANGE Y block to determine the speed of the traffic. (you can make this change by having the changing value in a VARIABLE and have it increase over time. This is what I plan to do next week).

These pieces of code will create a loop of clones of cars appearing and moving down the screen, deleting the clone and then starting again. You as the player can dodge the cars.

Next week, we will be adding:

  1. What happens when you hit traffic
  2. A timer, and a score – where you get a point every time you pass a car
  3. a powerup for more time
  4. additional animation (turn left and right, mud flying up when you drive on the edges near the grass)

Feel free to use the template above, I have shared it to be used – let me know if you use it and share it with me on twitter!

R

SPACE INVADERS – Part TWO (Group 2 – 2022) — November 6, 2022

SPACE INVADERS – Part TWO (Group 2 – 2022)

We had a good turn out this week and we carried on with our projects from before the half term. What is great about Scratch is that much like a real world game or program, you can carry on day after day, week after week building upon your previous work. It lets the class really build from a basic function to a fully formed game.

Last time, we got our spaceship under our control moving left and right and the aliens to clone themselves and appear, and follow a path down the screen getting closer and closer to our player over time.

This week, we are programming the player ship to shoot bullets back at the aliens. This deals with cloning again, along with destroying clones (both the aliens and the bullets) depending on what happens.

The code we use for this bit, follows the clone wars project from the Code Club projects section where we clone the projectile of choice (be it a lightning bolt, a ball, or a self drawn one) and write the code to fire it.

We need to do these following things to get this to work well:

  1. Make the clone appear at the spaceship when the fire button is pressed
  2. Move upwards on the screen until it either:
    • Hits an alien
    • hits the top of the screen

To make the clone appear at the spaceship we use a very simple set up of WHEN I START AS A CLONE the projectile will GOTO SPACESHIP. This means even if the player is moving left and right as the game is playing, every time they hit fire the clone will appear at the front of the ship.

The next bit of code deals with the movement and the deleting if it hits the top of the screen. We add a REPEAT UNTIL loop which will keep moving the sprite of the projectile up the screen by CHANGE Y BY 10 (or value of your choice) until the sprite is TOUCHING EDGE. As the only edge it can possibly touch is the top one, we don’t have to worry about any differences. As the code will move onto the next section after the REPEAT UNTIL section is complete, we add a simple DELETE THIS CLONE after, to dispose of the clone.

As an aside its always good to make sure that unneeded clones are deleted when not needed, as Scratch seems to have an upper limit before it starts to crash. I find if it has 100s of clones at once, it starts to slow down.

We will write a separate bit of code for when we hit an alien on the alien sprite. On the bat sprite, we write code that asks IF TOUCHING PROJECTILE and if so, we CHANGE SCORE BY X and then DELETE THIS SPRITE. By doing it this way round, the sprite has the control to delete its own clone, but not another. You can also add the reverse of this code to the projectile stating IF TOUCHING ALIEN DELETE THIS SPRITE. We do not need the score element as that is attached to the alien. This means each different alien could have a different score value. By doubling up on this code, it means the alien gets deleted, as well as the projectile. If you do it without deleting the projectile, it continues up the screen taking out columns of aliens before it hits the screen edge.

This one is key to make sure that the class are applying the code to the write sprites. Often kids will work on one page and add all the code to one sprite not realising they need to work on each element separately so the computer knows that each bit of code is for different parts of the code. It is also good to show them how to put code in the background as well for things that effect everything (resetting scores, timers etc). I often would explain this as “Global” versus “Local” code – and whilst I knew it wasn’t 100% correct in the wider world of coding, it allowed me to get across the point that some code would be “local” and only affect a specific sprite and some would be “global” and could be affected by, and affect everything in the game world.

Once this is complete, you have a functioning Space Invaders clone! It can be improved with extra elements such as the aliens shooting back randomly (which the class can be coaxed into modifying their code for the spaceship shooting code, just in reverse…)

You can also add little shelters that the spaceship can hide under, and getting the alien projectiles to delete when they hit them.

The other (harder) element is to use the MOD command to create a piece of code that makes a “Boss” alien appear whenever the score is a multiple of a figure. You can say:

“Everytime the score can be divided by 100 make the boss appear”.

This means you can add a bigger, badder alien with more movement to take on the player, but they get more points if they get him!

Next week we are doing the car racing game, which is a good move on from this game as we use a similar function for moving the car left and right, but then a new element with the code of the cars moving toward the player. On reflection it is similar to the Aliens firing back.

This is a good time to show the children two very different (on the surface) games and that actually under the hood and mechanically are two very similar games. Get them to think about other games that they play, and if they can see any similarities that cross over!

Speak next week!

R

Half Term Mix Up! — October 24, 2022

Half Term Mix Up!

This week was a bit of a change of plan, and its good to always have something in your back pocket when it doesn’t start how you think!

This week it was half term and I think wires were crossed, and instead of a full cohort of kids, we had two! Now I am not one to turn away people eager to learn so I thought on my feet and we reversed the class a bit. Instead of standing at the front we sat together, and we looked at a completed game and started to pick it apart.

I showed them the car racer game that was created for last cohort but instead of working through it building up the blocks, I showed them the completed game and asked the kids to explain what they saw and how it worked.

What worked well is that the car racer game has direct elements from the Space Invaders game we started last week. This is great to see if they notice the similarities in code (and in this case, completely identical) and how they can build upon other ideas, and on a more abstract level how they can see that the same underlying code can be the same for completely different games and situations (in this example, moving the rocket left and right is the same code as “driving” the car left and right on the road).

What also is a good thing to do when this happens (and every cohort we have one class where we get a low turnout) is it gives you a chance to focus your time and effort on getting some bigger points across – as your time is not as divided as it would be in a full class, you are able to really make sure the concepts are fully understood.

Next week should return to normal, but its always great to have that time to slow down and ensure that you can focus on the classes and the kids.

R

SPACE INVADERS – Part ONE  (Group 2 – 2022) — October 21, 2022

SPACE INVADERS – Part ONE  (Group 2 – 2022)

I took a risk this week. I decided to test my group with a multi-part, higher level lesson plan I had devised. Usually we would be doing the chat bot at this point, however I had a feeling that giving the class a bit of a challenge would be a great way to see how they are doing and push them to learn a bit more.

I decided to put together a clone of Space Invaders which takes some elements of the Code Club Lesson Plan Clone Wars and then modified it to include elements of the Space Invaders design, mainly the path the aliens take to go across the screen, drop, reverse, drop in that loop until they hit the bottom.

I broke this into two different lessons – the first was to create your rocket ship and get it moving and second to create your aliens, understand cloning and get them to move right to left.

The second lesson will be to program in shooting, scores, and including a boss alien that will be triggered by different score events.

Rocket Ship Movement

The rocket ship movement is identical to the one from the Code Club lesson plan, and I have linked that above. I have put a screengrab of the code below.

Here, you can see that its set that the rocket ship moves along the X axis depending on the key pressed on the keyboard. The AND statement works by saying “yes you can move left/right (button depending) but only if your position is greater/less than the value chosen (direction depending).

This works by creating an invisible barrier on the X axis at the 200px and -200px points so the ship cannot go off the screen.

It also has the costume switch that when you go left and right, the ship pivots slightly to give some more depth to the movement, and the switch costume to A at the beginning of the forever loop resets to the centre costume whenever no keys are being pressed. This code I borrowed from my other lesson plan – Car Racer

For the Space Invaders, we use code in a loop to get them shuffle across the screen, drop down a line and reverse direction. This is a section of the path contained in a forever loop, so they continue dropping further and further down the screen until they are A) destroyed B) hit our players sprite and the game ends.

The code for the bats is screengrabbed below:

Going clockwise from the top left – this code deals with the original sprite. Sets its size to an appropriate one and hides the original. It then has a forever loop to create a new clone of itself and then wait a second.

Top right, is the clone movement code. This sets the clone into the top left of the screen and shows the sprite, beginning its path along to the right, dropping down and returning to the left. the forever loop keeps this going.

Bottom right controls the animation of the sprite (in this case a bat) and its wings flapping as it travels. this also keeps them all in sync.

Bottom Left deals with adding a point when a bat is hit, and deleting the sprite in question. We haven’t done this part in the class yet but this is from the overall code.

For next week we will do the shooting code, and I want to reassess the code for the movement of the enemy, so we can increase speed without any issues. Currently, the figures are static, so if I say that movement changes to two steps over one, it messes up the repeat loop – so I need to think of some code to allow it to stay within certain constraints.

Also we will add score, high score and also a boss that is triggered using the MOD command. if the score can be divided by a certain number we can show a new boss sprite.

Any questions message me on twitter!

R

CODE CLUB LESSON THREE – WHACK-A-GHOST! (Group 2 – 2022) — October 16, 2022

CODE CLUB LESSON THREE – WHACK-A-GHOST! (Group 2 – 2022)

I like how this game was the first week of October. A suitably spooky game for a suitably spooky month! I like this class as we put together the first two weeks worth of classes into something forming a game. It includes a timer and a score, which starts to form into something bigger and starts to build the foundations of what is a game and what you need to create a fully formed game.

This week we cover the following:

  • Variables
  • Operators
  • Repeat Until Loops
  • If Statements
  • Where is best to place your code

From my previous teachings of this class:

We start by getting them to add a suitably spooky background and ghost sprite and chat about how we can first get this ghost to disappear and reappear through hide and show commands.  This is then followed by moving the ghost to random positions to then reappear.  This is the first time that the class will encounter the operators and another instance of where the ordering of your code will make all the difference to the outcome.

What interested me this time round is half the group went and chose a sprite, whilst half the group drew a sprite (or modified an existing one) to start their game. This shows they are understanding the abilities of Scratch, what they can do and that they are understanding the interface of Scratch.

The first element that the class take is taking that ghost sprite and making it appear and disappear in place. This is the first area that they learn a lesson revolving around code ordering, and how code is executed in a list style from the first element, to the next, to the next. I like to use the analogy of a todo list, working your way from the first item to the last.

The class often make the error that the ghost flickers, rather than pulses on/off for a second, because they forget to put a WAIT command after the second element and this correctly paces the sprites pulse.

The “random” movement part is always the same stumbling block and the same happened in this group, like below:

…They started by trying the “Go To Random Position” block, which whilst it works is not perfect as it uses every possible position on screen meaning the sprite is often placed practically outside the field of view, and it looks messy. We chatted about how this doesn’t look very good and makes it hard if only small chunks of the sprite are peeking out from the sidelines as you cannot actually click on it to win.

We then walk through a solution of making an inner “wall” where the sprite can spawn anywhere within a set invisible boundary, meaning that even at the most extreme outer edges of this, it is still 100% visible on screen.

Teaching them about the inner “wall” is a useful tool about boundaries and how you can control the game with invisible sprites also. A good example to talk to kids about this, is to talk about games they play that have invisible barriers (where you cannot leave the edge of the map, or a more physical one is the bedrock in Minecraft, that is both an element of the game but also a limit put in place to contain the world).

Variables

After this has been set up correctly we move onto variables which is always a hurdle for some children as you are explaining it.   We create a variable for Score, HiScore and Time.  We then complete the easiest of the three – by adding a “When this sprite is clicked” event, and having the sprite hide, then adding one too the Score counter.  This is then extended by adding a set score to zero block prior to the “hide/show” loop to reset the score every time it is restarted.

This group took to Variables far quicker than others in the past. I always ask if they have used variables before and what what do and this time got a create description:

"A Variable is a container for a name, or a number"

These are often a struggle for some children. Whilst I was talking to the class this lesson one of my class had the brain wave that you could put anything in a variable, and then that opened up the idea of what the game could hold, and what you could do.

Operators

Operators, are fantastically useful and as I always try to drill home every time I teach them (in their most simple form) “they are just maths”. I get them to realise how this is where it can get complicated as you can Nest (put code inside code) over and over again to make complex strings.

Operators are great to “ask” questions about things such as positions, speed etc. By using the Boolean AND/OR options you can say if things are able to run or not if two or more other elements are positive. I use this in future lessons a lot.

Next week, to see what the children have retained and as a bit of a change up of the sessions, I am working on a Space Invaders style game to test them as I feel this group are doing well and want to see what we can do with something a little more complex using CLONES. The rest of the elements are similar to what we have just done.

See you all next week!

R

CODE CLUB LESSON TWO – LOST IN SPACE (Group 2 – 2022) — October 5, 2022

CODE CLUB LESSON TWO – LOST IN SPACE (Group 2 – 2022)

Week two of Code Club and we gain a few new members! Due to additional bank holiday last month we started a week later which through a few folks out for holidays etc, so we are close to a full (bigger than usual!) cohort.

Week one and week two are great introductions to some basics within Scratch, and great to see what level the class are at so you can bring them all to roughly the same level before next week where we start to plug it all together in a functioning game. The lesson plan from Code Club I am using is this one.

This week, we start to work on how to make sprites move, including motion and size so we can start doing pseudo 3D animations.

I am going to refer to other posts and previous sessions of this lesson, and the one that always rears its head for this type of lesson is the below:

The main thing to get them think about here is how the computer interprets the commands they are giving it, and how literal the computer will interpret these commands.  

I do not think I have had a class where the following doesn’t happen and it’s a good way to talk about the how literal a computer is. Often at this stage we are creating the code that states (in human terms):

“When the game starts, the rocket will go to the earth”

Now, if I said to you, the reader “hey, can you go to the kitchen?” you would then move from where you are toward the kitchen.

In Scratch, there is a GO TO command that comes in several different forms and can imply that it will make a sprite GO TO a place, and it is correct, however it will move it instantly, rather than in the smooth motion that we are expecting.

This reminds me of when I was very young and using a piece of software that in hindsight was a proto-scratch called The Games Factory (drop me a message if you remember this!). I remember making a game and one of the things I wanted to do was my character to shoot a barrel and it explode. I wrote the code that when I pressed SPACE it would shoot a barrel.

The game took that literally, and my character shot barrels as bullets from the character up the screen. I learnt a very big lesson on how computers understood my commands!

Outside of this, the coordinates are a new element that they have to deal with which some children have not approached in Scratch, or in Mathematics. We talk about how they work and in the newest version of web-based scratch they offer a lot of help with positioning and ease of use, such as highlighting the X and Y coordinates of a selected sprite just below the play area, and also automatically copying the X and Y coordinates into motion blocks where applicable, this is a very useful feature.

What I like to do is to draw a screen on the whiteboard, and then highlight how the screen is broken into four quadrants, with the intersecting middle position is always 0,0. (as an aside, any sprites that go shooting off the screen, a piece of code attached to said sprite with WHEN FLAG CLICKED, GOTO X 0 Y 0 is a fantastic way of finding lost items).

My usual challenge for this week applies, which I have copied from the last post:

The challenge I added to the lesson plan was to give even more depth to the scene, having the earth rotating, and also having a “moon” orbit like so:

I show the children this in action and talk to them about the basics, I don’t show them the code but I give them some clues (the major one is to think about it in “layers”). They get the hints from me:

  1. It happens from the start of the program
  2. it repeats forever
  3. inside the loop, it is four blocks of code.

This works primarily around layers where it moves to the back layer, glides across, moves to the front, and glides back (shown below).

This is a simple bit of code with a great result and was interesting to see them attempt it!

This group we got one completed 3D moon orbit, but one of the children had a unique attempt at this, whilst not getting the 3D element right, did a great top down orbit, with having the moon glide to points around the earth, and realising the more points he added, the smoother the orbit would look. I want to look at a cleaner way of doing this to demonstrate it, maybe working on first a smooth motion where the moon is held a set distance away whilst rotating in orbit.

My first thoughts are:

  1. create the sprite where the graphic is offset in the editor, and the “middle” of the sprite is offset meaning when it is rotating it will appear to circle the earth.
  2. Write some code in which the moon is always trying to move toward the earth and in either right or left, however place a limit on the distance the moon can be from the earth (this is similar to the code in the Bug Race game we did last time, where the bug will stop when the distance is less than a certain amount of pixels). the code would have a motion toward the earth, along with a direction “down” in relation to the sprite which together would translate into an orbit.
  3. The toughest, would be to model some very rudimentary gravity where variables for Mass are attached to the sprites to calculate pull.

Next week we do our first game combining all the above, plus additional features with variables, and it comes just at the right time being October and we are creating a “Whack a Ghost” ghost hunting game. You can look at what we did last time here!

R

CODE CLUB LESSON ONE – ROCK BAND (Group 2 – 2022) — September 28, 2022

CODE CLUB LESSON ONE – ROCK BAND (Group 2 – 2022)

Is it that time already?! After the break during the pandemic of 3+ years, it hardly feels possible that we are on group 2 of children for Code Club.

The first class is always a good one, as we find out what the class is going to be like, and we get to know each other and I get to see what level they all are at. Its always a bit of a busy session as we’re sorting everything out and seeing what it is all about.

I started and ended the lessons differently than I have before – I firstly lead with going over what they already knew (which I always do) and then talk them through the kind of things we will do over the next months. I took in the 3D printed robotics that I had done for the last class and showed them what we will be doing toward the end. This really worked well to gauge their level and interest.

We went over similar things during this session that we did in older ones and its a fantastic way to gauge what they know already and how to accelerate or pace the classes accordingly.

This time, the class has less experience than previous groups with only one of the class saying they had done anything similar, which was with Micro:BIT. This is great in terms of teaching as you don’t have to push against someone else’s teaching or confusing the students with telling them different techniques and information than at school.

The class picked up the basics well, and I pushed it a bit with adding REPEAT LOOPS into the animation part of the band members, showing them how they can get their characters to dance, change colour etc as the sound plays. They picked this up quickly and really ran with it.

At the end, I took the advice of one other Code Club Volunteer Colin at one of the Code Club Q&As and I did a variation on the show and tell that he runs at the end of his clubs. I got the children to explain to their parents what they had done that evening, and explain how they did it. It was a good way to see who had retained the info, and understood it well.

I have focused less this post on the code, as I have covered that twice before and wanted to focus this time about the teaching, and the other elements surrounding the actual coding. I will be doing some brand new lessons this time, and expanding the Dungeon Crawler over 2 or 3 weeks to get them to create a fully fledged game.

Next week we will be doing the space animations, and my favourite element is to add the pseudo 3D orbiting planets and see if any of them can figure it out!

See you next week!

R

CODE CLUB WRAP UP AND PLANNING FOR SEPTEMBER (2022) — September 7, 2022

CODE CLUB WRAP UP AND PLANNING FOR SEPTEMBER (2022)

12 weeks and 1 Game Jam later, the first class at Congleton Library is complete, and I am already planning on what we will be doing at the end of September when the classes begin again.

The last 3 or so months of classes have been fantastic and this time I have been able to expand a bit further with lessons designed by myself which I would like to write up properly and use again this year.

The game jam was a huge success, with one of the class taking home the first Congleton Library GameJam trophy. The GameJam lasted for an hour, and the theme was the Commonwealth Games.

Sadly, due to a family emergency (and then recently coming down with Covid) I have not been able to do the additional lessons that I wished to do with Micro:bits. I had created two robots that could be controlled remotely and my plan was to have two teams, where in each team they worked together to program one micro:bit to be the controller and transmit, and the other to receive and tell the robot what to do.

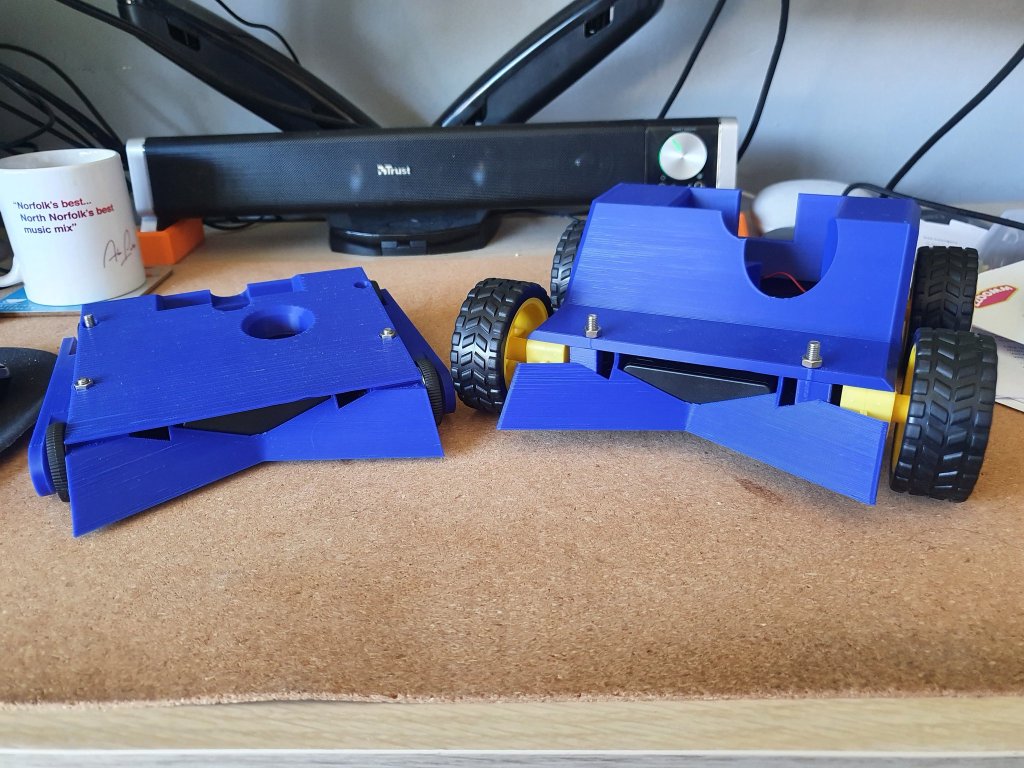
The two sumo robots, hastily built! Do not look inside for the mess of spaghetti wiring.

I hope soon to design and build a more feasible set of sumo robots, as these whilst working and good, have a lot of wasted space inside and could be smaller with better chassis.

I also plan this time to take one of the final lessons that we run, the dungeon crawler and turn this into a two or three part lesson to really shape it as a game. This has a lot of functionality and for one hour it is a lot to cram in. Having it spread over two or three days will allow us to add all the features and the class to really build a fantastic game.

I would love to write some more lessons that are lead by the ideas of the class this time, in the last set of sessions we did a car racing game which came from a conversation about what kind of games the class would like to do and I will be doing something similar this time and design something around their ideas.

Signing off before planning some more things for the next classes along with new code club medals for when they finish, I do plan that every class has their own unique medals for when they finish that last class.

What are you all doing for your new classes? or what would you love to do? Let me know on Twitter @titchard

R

CODE CLUB GAME JAM (2022) — August 11, 2022

CODE CLUB GAME JAM (2022)

We’ve had some great lessons over the last 3 months, the class have gone from strength to strength, working through lots of different and tough games and programming challenges.

A great way for the class to show how far they have come is some kind of project, or event that they can show what they know without being as lead by myself as the leader of the club. One of the ways I love to do this is the Game Jam.

I have ran Game Jam events at my previous Code Club before the pandemic, but this year was the inaugural one at Congleton Library, so I wanted to make it special with the first Game Jam Trophy for the best game.

One of a kind! I think I will design a different one for next year, keep it unique.

If you are not familiar with the Game Jam, it is an event where you are given a theme or topic, and have to make a game (generally it is the framework and idea of the game) in a set timeframe. Game Jams often take place over 24 or 48 hours either in person in a shared space, or online. Here is the Wikipedia page as a good starting point for the ideas.

Now, with a younger class and at the mercy of the library opening times we kept the Game Jam to 1 hour. I wrote a theme and a few features to include on the board and set my phone timer for 1 hour.

The theme I chose as it was happening at the time was the Commonwealth Games. I chose this as it was current, and it also had enough elements that they wouldn’t suddenly freeze and go “I know nothing about X”.

This can be something to think about when you do a game jam. There are many really fantastic Game Jam generators on line and they are brilliant, however they can be a bit abstract and possibly a bit above the level of the Code Club so its worth baring that in mind. I used the one above to start my thought process and whilst I sat thinking all sorts of ideas for some of the themes generated, when I stepped back I thought it would be hard for the class to do.

The only features I insisted on where:

  • 2 players simultaneously
  • 2 scores and a total score
  • Team based / cooperative

The children where left to their own devices, but I would help them along the way with any questions or queries, so it is very much a self driven lesson. You will see that they also realise how much more they remember/have learnt over the 12 weeks as they will be powering through with some excellent ideas.

After an hour had passed, I had everyone show their game to the group and talk us through what it did, and more importantly, how it did it. This is great as not only do you get to see the class make the games, you can assess their understanding in their explaining.

This time as the games were based around the commonwealth games, we had lots of sports themes including hedgehog boxing, velodrome bike racing and the 100 metre dash!

What is really good is the class creating something out of finite resources, both in time and content within scratch. They really push the limits of what they know to make something out of what they have to hand.

Next time I would love to make use of a longer time frame, maybe 2 hours with a small break in the middle to really let them take advantage of what they could do. I would also love to do a Micro:bit challenge, with some tangible elements such as robotics, or sensors to show what they have learnt.

Next week is my last lesson with this group and we are doing a Micro:bit lesson where I have built to robot sumos to duke it out!

R

CODE CLUB LESSON TWELVE – DUNGEON CRAWLER (2022) — August 6, 2022

CODE CLUB LESSON TWELVE – DUNGEON CRAWLER (2022)

The last scratch lesson that was put back due to our class being held on the hottest day of the year! This week, we are creating a dungeon crawler, utilising backdrops to create the different levels of a dungeon as you go deeper and deeper into the dungeon.

What makes this great is once you set the rules of the player and the level design it can expand as much as the imagination.

When you are designing your levels, you follow some simple rules:

  • The entry door is one colour
  • The exit door is a different colour
  • All walls the same colour
  • The entry and exit should always be in the same spot on every level

When we follow these rules, we allow the player to advance through as many different levels as possible, as they will follow the same structure. By having the entrance and exit in the same places, we can have the player character spawn in the same coordinates on each level making the level design simple.

By having the entry and exit doors the same colours throughout the levels (for example green for entry, red for exit) you can set a overall script to say that touching red will advance the background, whilst green will go back one background.

By saying next/previous background rather than specific levels, it will flick through the backgrounds in number order (like flicking through a book) allowing a player to advance/retreat at their choosing. This also allows you to add collectables in later levels that they can return to in use (for example, a key in level 5 that opens a chest on level 3).

for movement of the player character, we create a FOREVER loop containing IF commands for each of the four directions. What we do for each direction we change X or Y by a positive or negative value to show movement (for example, -2 or 2).

To prevent movement when walking into a wall, we nest (put inside) each of the IF statements for direction another question, we say if touching colour (where the colour is the wall) then the movement is the opposite amount and cancelling the number to zero. For example, pressing right changes X by 2, but if we are touching the wall, its changing X by -2, which cancels out to 0, meaning no movement. This can often trip up the class and this is a good example of coding where they need to proofread their code to check it is all correct.

An example of the nested code for moving in a direction

Adding items/enemies etc into different levels is a bit tricky, but the trick is to have the hidden unless they are on the correct background. This means all elements are hidden on start of the game, and then revealed when the background for that item/enemy is present.

Each item will have a FOREVER loop with an IF ELSE command inside, and the question the IF ELSE is asking is the room we are in, is the number right?

The room VARIABLE counts up and down as the player goes through doorways. Every time a player goes through a door to advance a level, the room VARIABLE is increased by 1, if they go back, it decreases by 1. This then gives us a piece of data we can use to influence different parts of the game.

The item / Enemy etc is then positioned and programmed accordingly for its situations (for example, programming the enemy to move back and forth along a corridor).

We finished this class by handing out the code club certificates and medals for all who were attending, closing the first set of classes for Congleton Code Club!

Everybody had a great twelve weeks and we are planning on doing a couple more sessions over the summer, a Game Jam, and a Robotics Session with the Microbits.

R